Vault Bridge Settings
Use the Bridge page to set up the connection or "bridge" between a particular vault in your Sage Intacct Paperless system and your Sage Intacct accounting system.
This "bridge" provides data lookups for indexing documents and throughout APFlow™ Invoice Entry (including Routing and Approval).
Note
The APFlow™ Bridge page in APFlow™ Settings has the same functionality as the Vault Settings page discussed below.
Important
Before you successfully bridge to an accounting system, None displays in the visible fields.
From My Paperless, click .
In the Vault Settings navigation bar, click .
The following page displays:
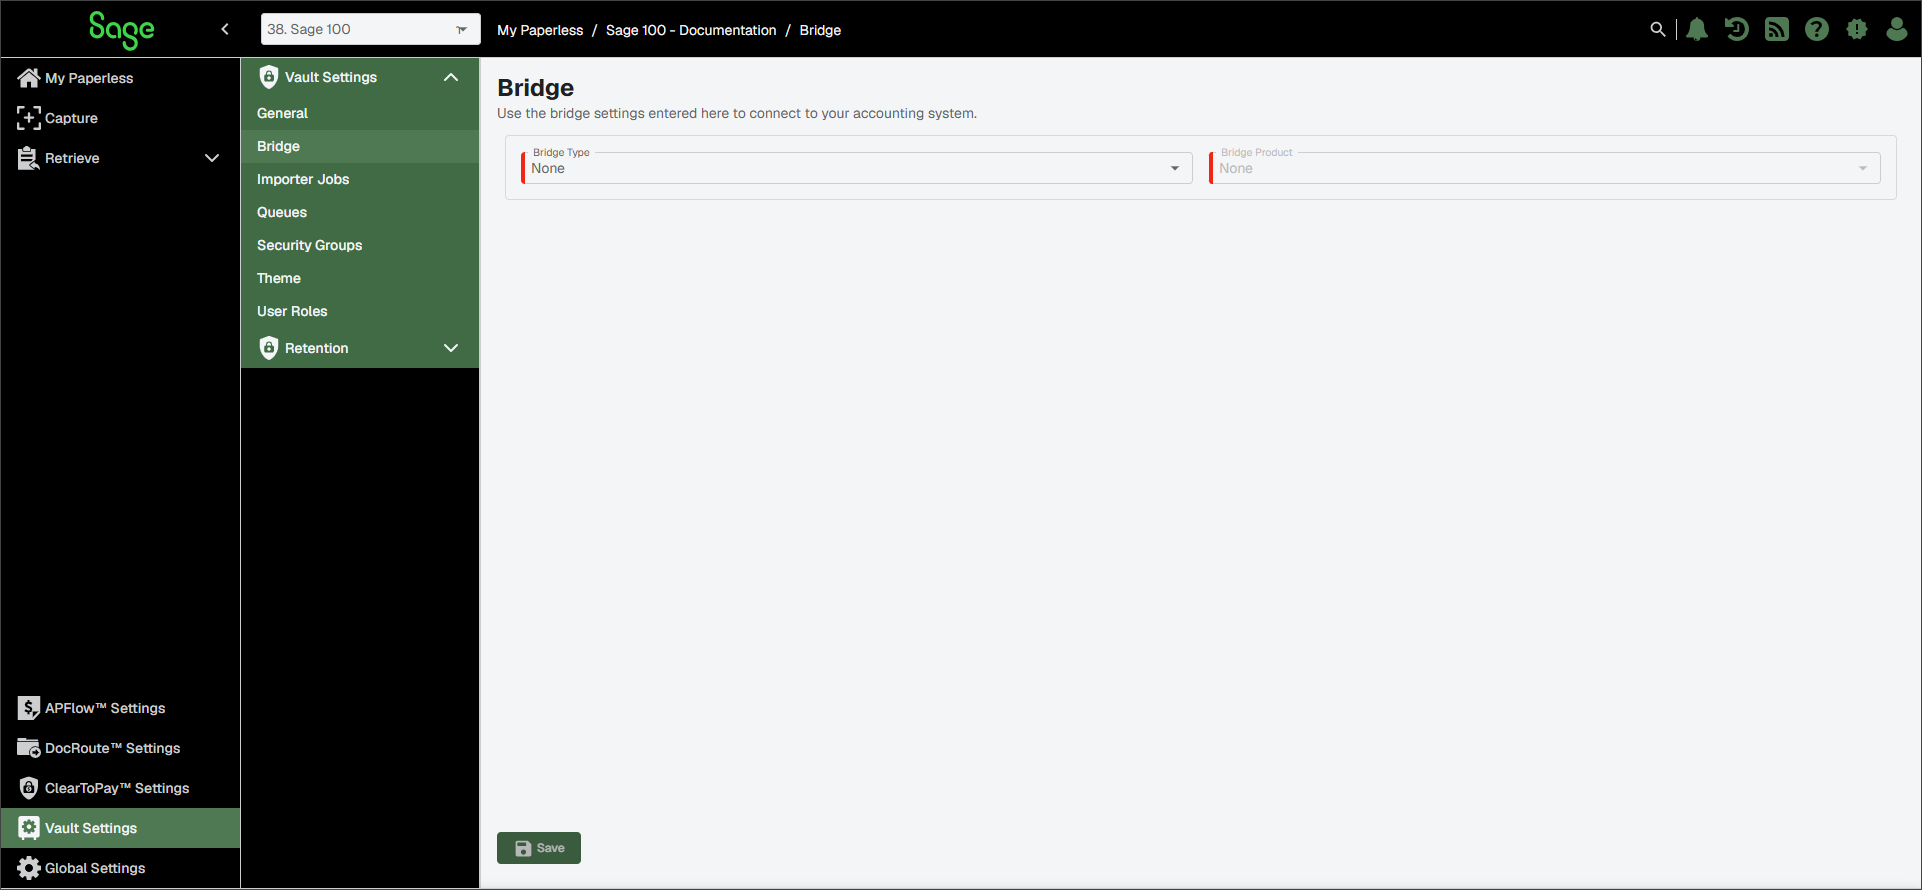
From the Bridge Type dropdown, select .
Note
The Bridge Type dropdown reflects the different business categories Sage Intacct Paperless is integrating with. If the Bridge Type field is set to , the Bridge Product field is inactive.
From the dropdown, select .
Continue to Sage Intacct Bridge Settings.
Sage Intacct Bridge Settings
The vault "bridge" connects Sage Intacct Paperless to Sage Intacct. The bridge provides all of the data look-ups and exporting features needed to run the Sage Intacct Paperless system.
Once the Bridge Type and Bridge Product fields are populated in Vault Bridge Settings, the Validation Configuration fields are accessible.
Complete the following steps:
The Connection Url field should systematically populate. If it does not, enter your company's Connection URL manually in this field.
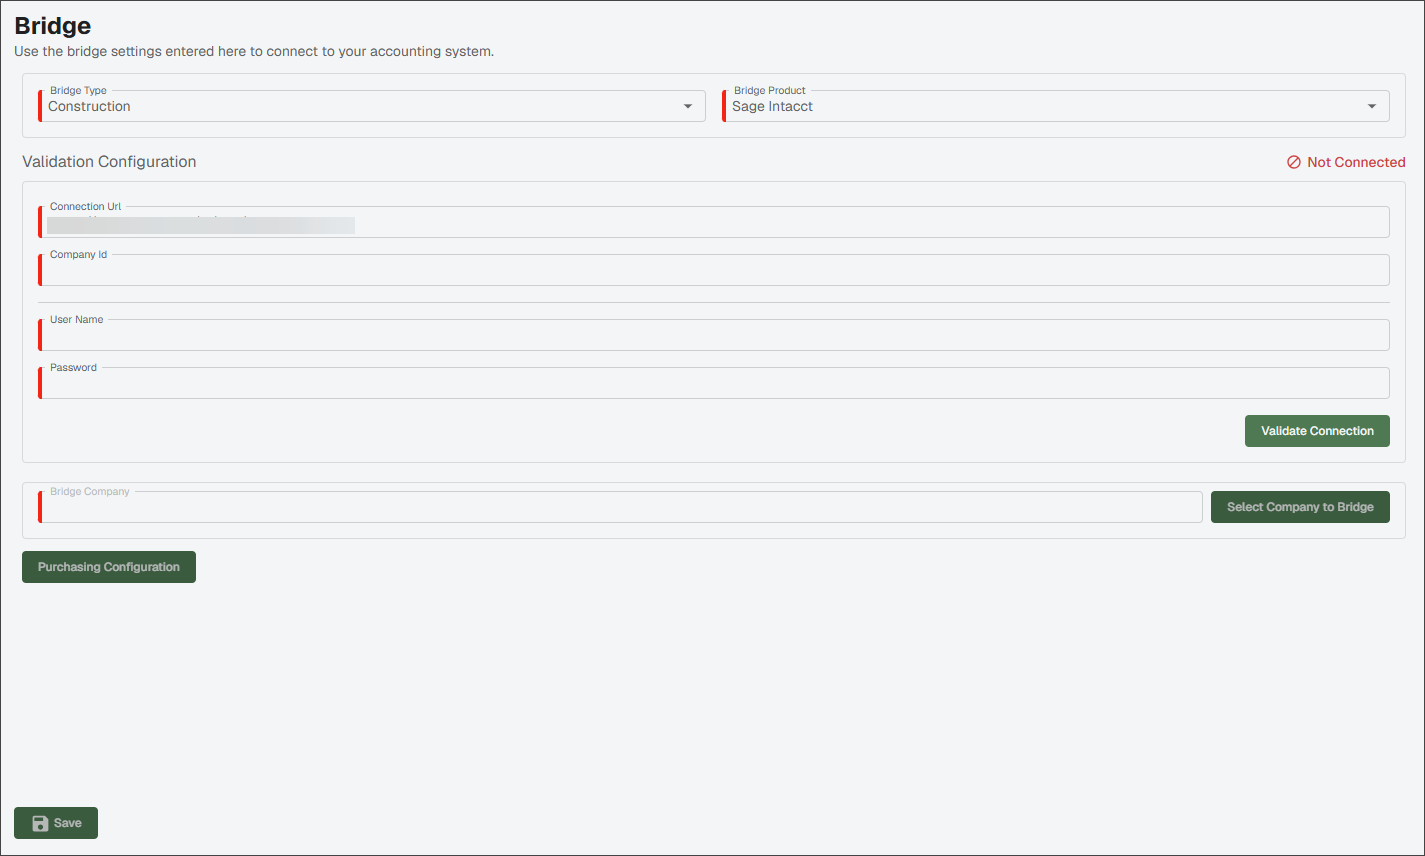
In the Company Id field, enter your company id.
In the User Name field, enter your user name.
In the Password field, enter the password associated with your account.
Click .
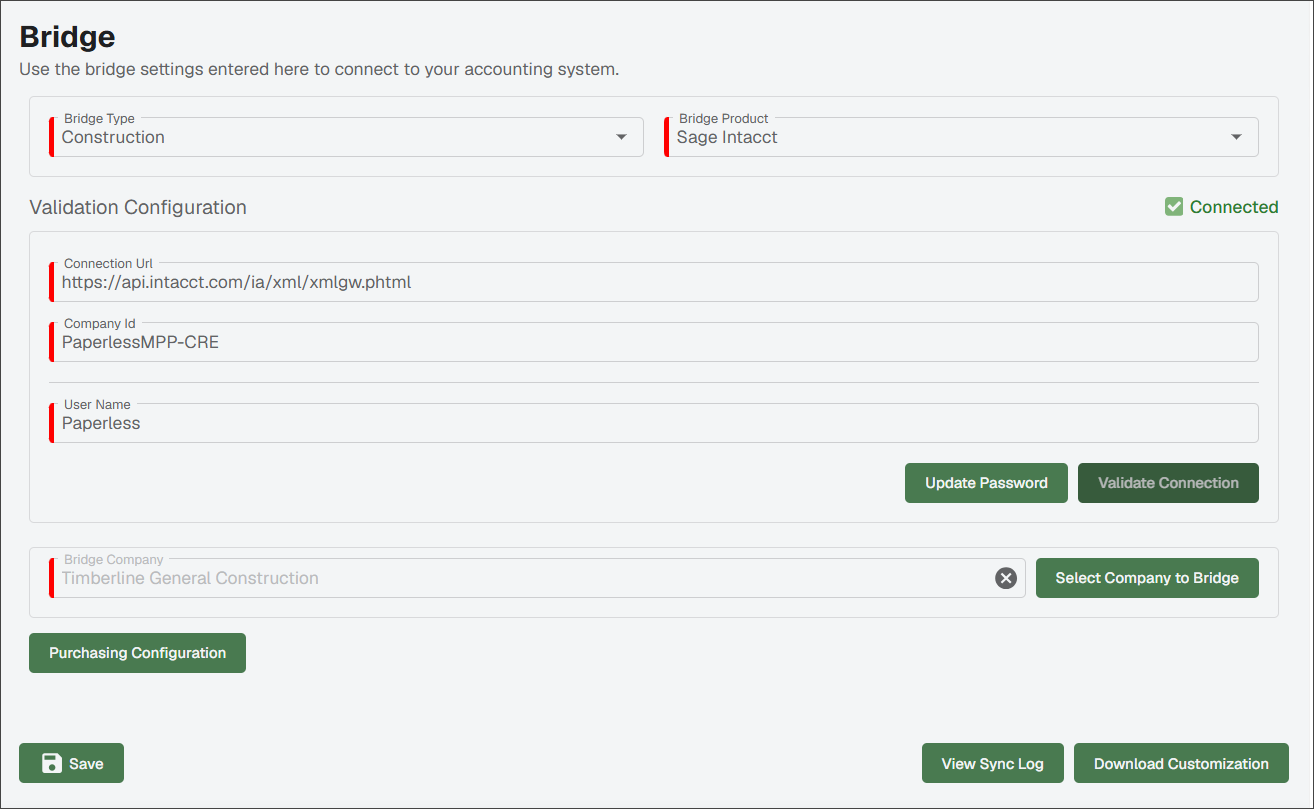
The page updates to confirm your connection and a Bridge Company field displays:
Note
Once bridged, if you need to change the password associated with the Company Id, click .
Click to access your Bridge Lookup list similar to the following:
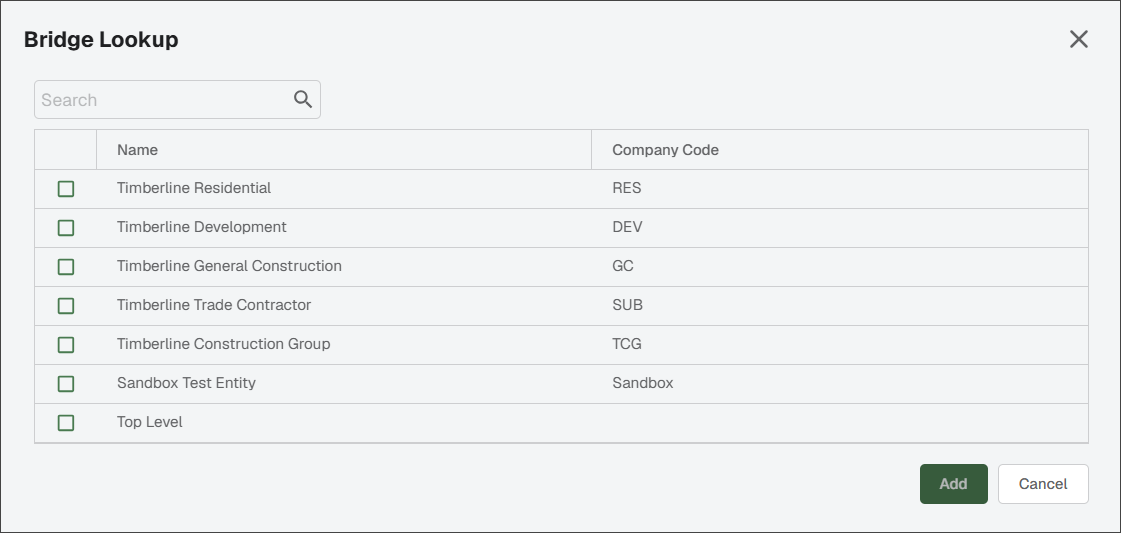
Select the check box associated with your bridged company.
Click .
Click .
To map your transactions, refer to Purchases Configuration.
Sage Intacct Application Install
After bridging to Sage Intacct from Sage Intacct Paperless, a Paperless Integration application is systematically installed in Sage Intacct.
The application facilitates the systematic syncing of data from Sage Intacct to Sage Intacct Paperless as data is added, edited or deleted in Sage Intacct. You can access this application in Sage Intacct under the Platform Services menu.
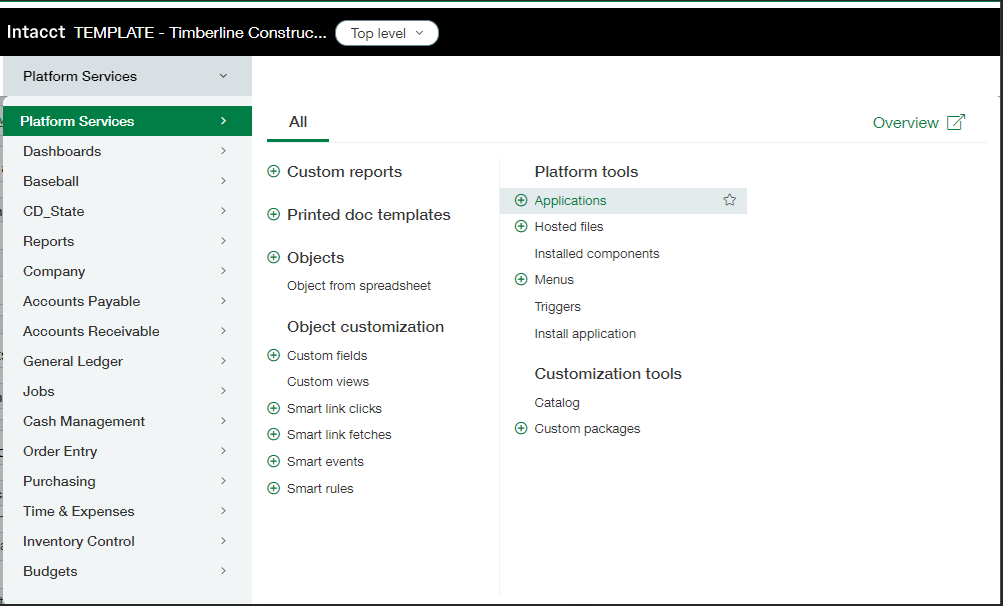 |
From here, you can view the Paperless Integration. No action is needed to facilitation the install or the update of the Paperless Integration application.
Purchases Configuration
Instead of having a section for Purchase Orders and another for Subcontracts, Intacct implemented configurable transactions and workflows in their Purchasing module. These transaction types can be configured to fit your company's needs.
To integrate Sage Intacct Paperless with Intacct's Purchasing module, you will need to map your transactions into our provided line types. You can map multiple transactions to the same line type.
In Intacct
Navigate to the Purchasing module.
Click the tab.
In the More section, click .
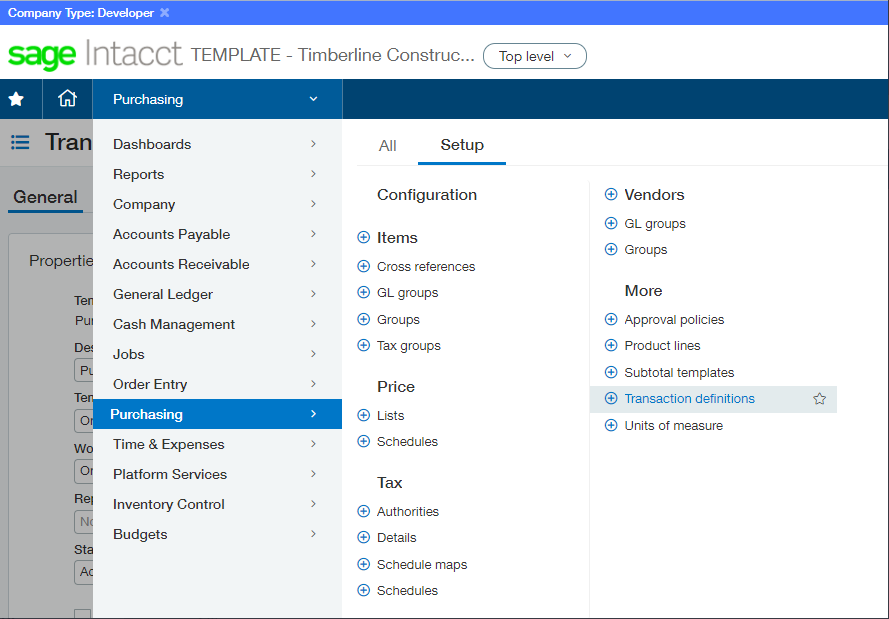
In the Transaction Definitions: Purchasing page, identify transaction definitions, descriptions and workflow categories based on your company's needs.
For example:
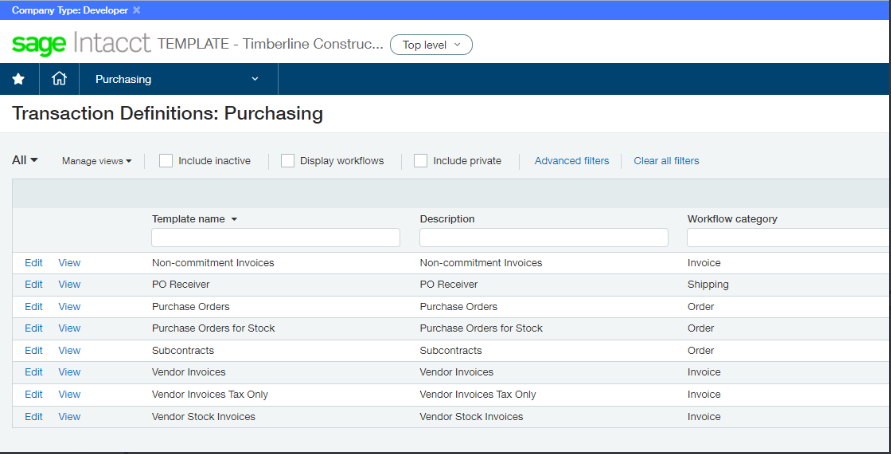
Be sure to make a note of how you configured your company's purchasing transactions.
Edit Subtotal Dimensions at the Top Level Setting
To edit dimension values on subtotal lines at the top level, complete the following steps:
From the Purchasing toolbar dropdown, click .
Under the Enable functionality dropdown, select check box.
Click .
With this functionality selected, dimension amounts distributed either systematically or manually may be edited as needed.
In Sage Intacct Paperless
From My Paperless, click .
In the APFlow™ Settings navigation bar, click .
A page similar to the following displays:
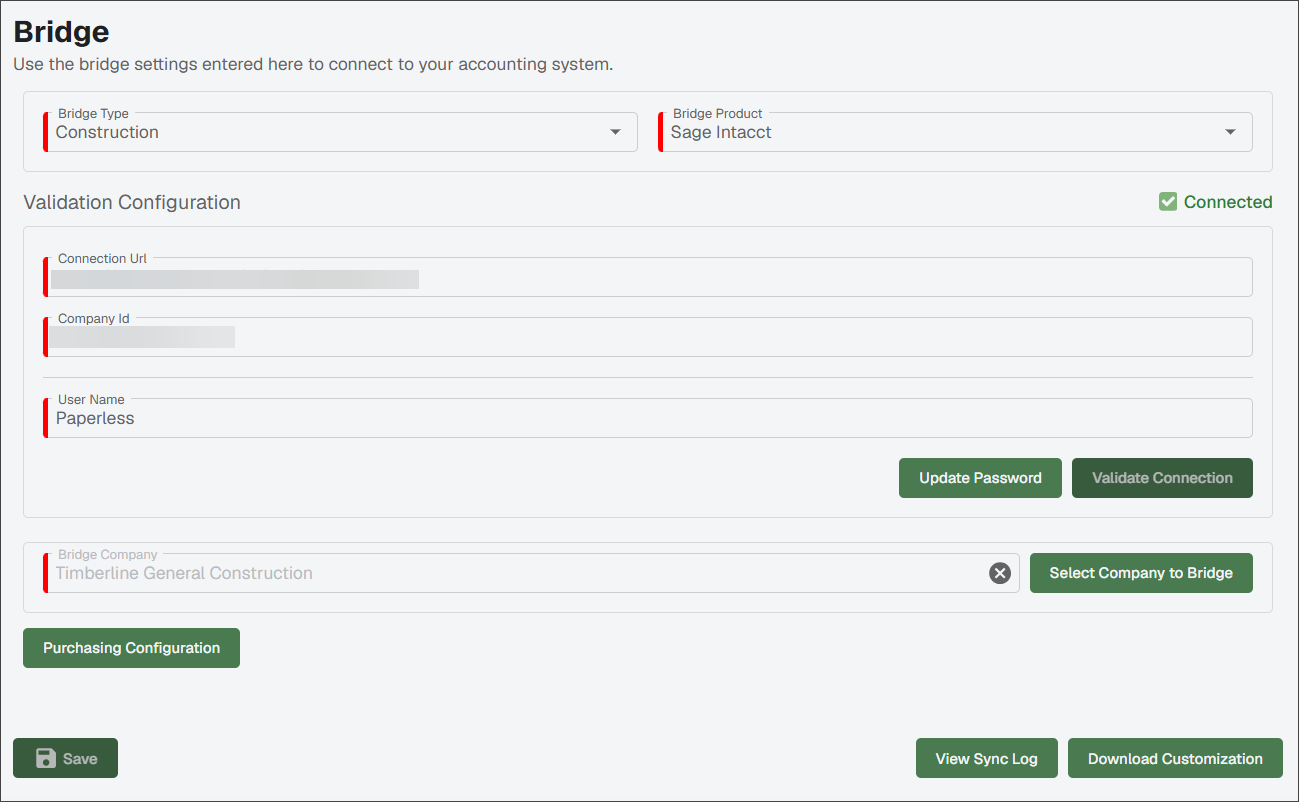
Click .
The Purchases Configuration dialog displays:
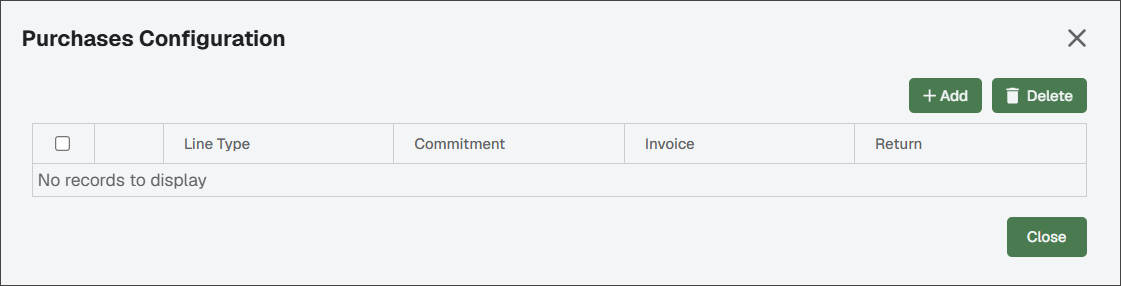
Click .
The New Purchase Configuration dialog displays:
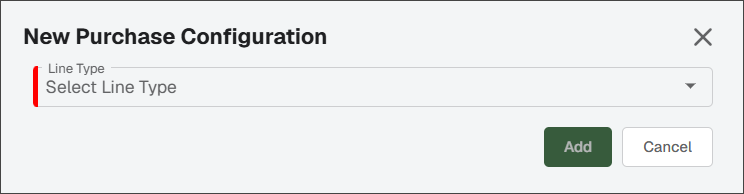
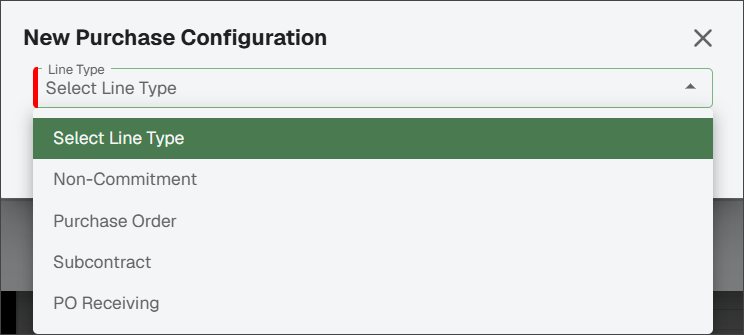
From the Line Type dropdown, select the purchase transactions that you configured in Intacct. See In Intacct for more information.
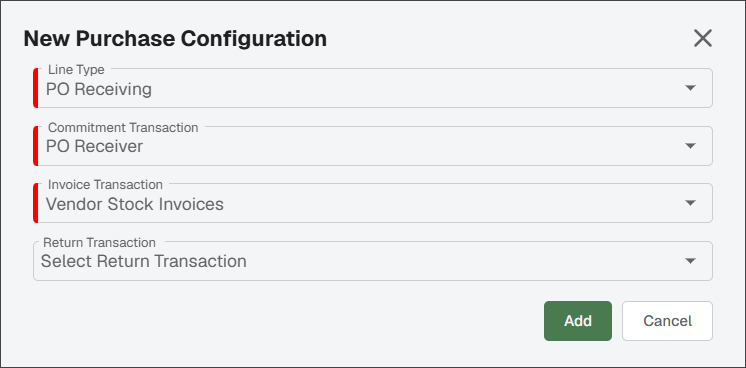
The fields that display are based upon the line type you select. In this instance, PO Receiving, was selected. These are the fields that display to support that selection:
Click .
Non-Commitment: Used for creating invoices in the Purchasing module that do not convert from another transaction type. You can map invoice template type transactions that have a create policy of new document only or new document or convert.
Purchase Order: Used for processing purchase orders that can be converted to an invoice. You can map order template type transactions that can be converted to an invoice template type transaction that has a create policy of convert only or new document or convert.
Used for processing subcontracts that can be converted to an invoice. You can map order template type transactions that can be converted to an invoice template type transaction that has a create policy of convert only or new document or convert.
PO Receiving: Used for processing purchase orders that you receive first before converting to an invoice. You can map list template type transactions that can be converted to an invoice template type transaction that has a create policy of convert only or new document or convert.
Debit Memo: Used for processing returns for items already invoiced. You can map an invoice template type transaction with a return workflow category to any of the existing mappings by selecting the transaction from the return transaction dropdown list. The transaction needs a create policy of convert only or new document or convert.
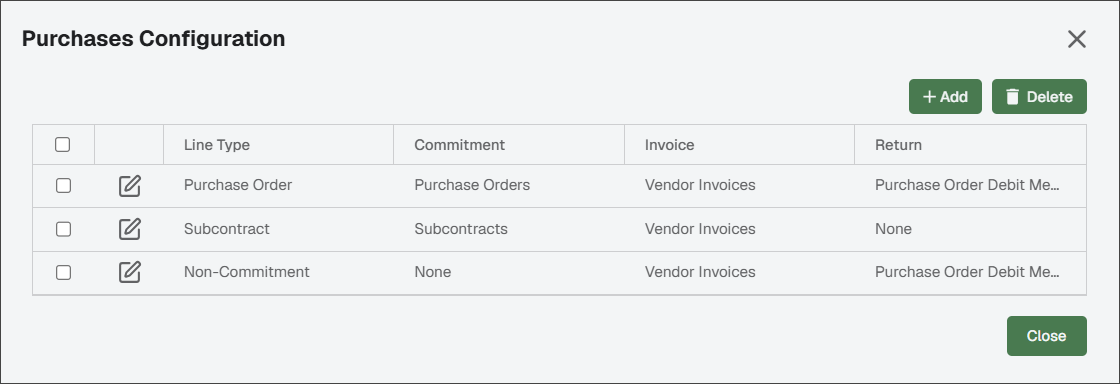
A completed Purchases Configuration dialog resembles the following:
 |
View Bridge Sync Logs
As data is added to the Sage Intacct accounting system, that information is systematically synced to Sage Intacct Paperless. However, if there is data you know was added or you added it yourself and it is not visible, click where you can manually submit a request for the sync process to run.
A dialog similar to the following displays:
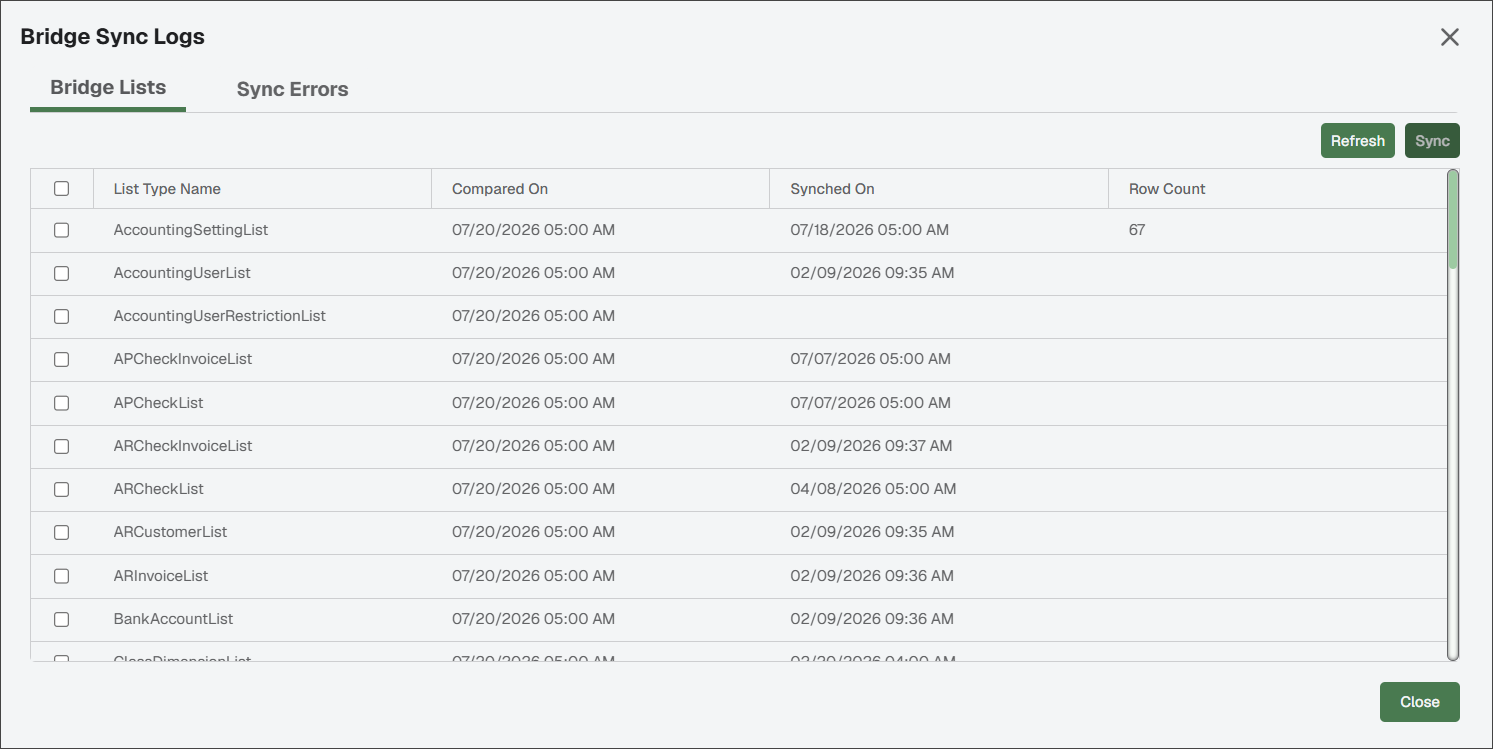
Select individual lists or the check box in the header to select all lists to be synced. Then, click .
Sync Errors
Sage Intacct Paperless support personnel use the data that displays in the Sync Errors tab when troubleshooting issues.
Delete a Bridge Connection
From the Bridge page, administrators can complete the following steps to delete an existing bridge connection.
Caution
Deleting a bridge deletes its bridge connection data from the system. You cannot save the newly added bridge connection data until all previous bridge connection data is successfully deleted.
From the Bridge Type dropdown, click .
Click .
After deleting a bridge, there may be a delay before you can add—and save—a new bridge. For more information on setting up a new bridge, see Sage Intacct Bridge Settings.
If the previous bridge connection data is still being deleted when you are ready to save the newly added bridge connection data, a message displays stating the previous bridge connection data is still being deleted and asks that you wait for a short time.